
The Tab Key
If you need to cycle through possible selections, use the Tab key. For example, suppose you are hovering your mouse over the model below:

The part turns a salmon color, telling you that if you left-click or right-click your mouse, it will be selected. However, notice the cursor: it's shaped like a "+" sign with a Tab arrow on top of it. That tells you there are multiple possible selections, and you can press the Tab key on your keyboard to cycle through them all. This can be particularly useful when your part and stock surfaces overlap and you want to make sure you select the right one, or if you want to select a toolpath on a part so you can backplot, verify, or post process it.
Translucency
If you are importing stock as well as part surfaces, you may have some trouble seeing the part, since the stock covers the part completely. Simply right-click on the stock and select Toggle Translucency from the menu, and you'll be able to see the part through the stock:
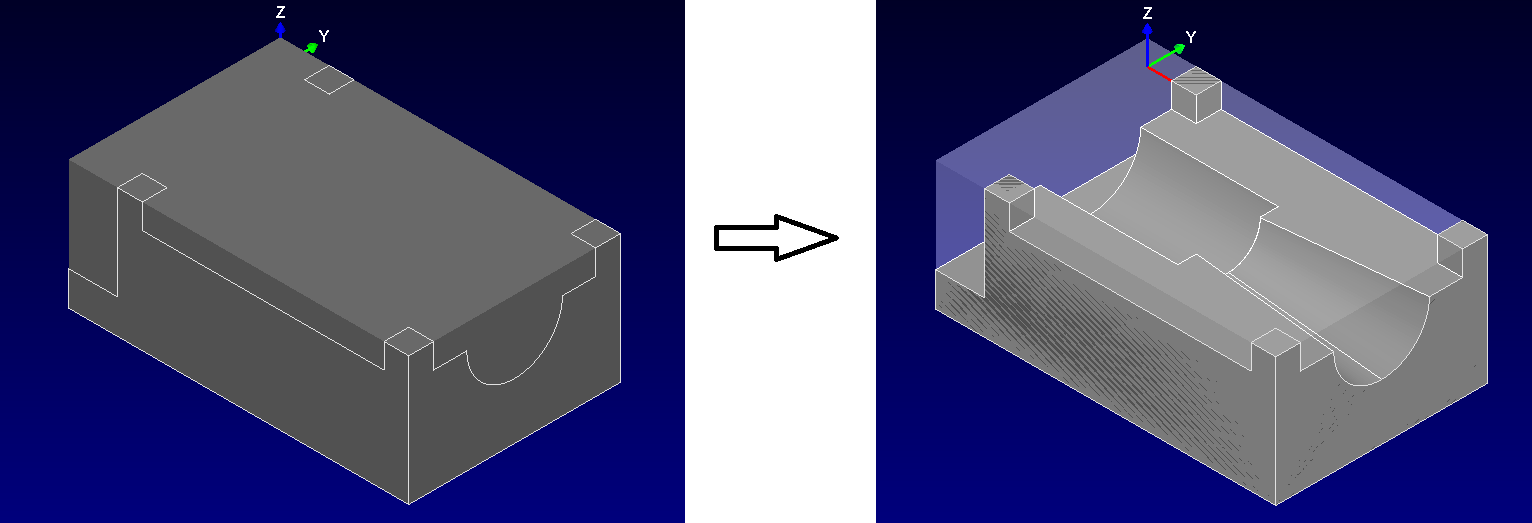
Using the Tab key, you can easily cycle between the part and the stock when you are ready to select them for a VoluMill operation.
The Power of Post Processing
You probably know that you can use the built-in postprocessor to create G-code to run on a milling machine. But did you know that you can also use the post processor to create CL data or other custom formats? VoluMill Universal automatically installs post processors that generate CL data you can use to bring VoluMill toolpaths into Siemens NX, CATIA, Mastercam, and other popular CAM programs. And because Post Processors are fully customizable, you can generate other formats as well; just use the installed posts as your guide.
Deleting Chains
If you make a mistake in chaining or want to remove a chain you've made while creating a 2-axis toolpath or adding boundary containment chains to a 3-axis toolpath, just right-click on the chain and select "Delete":

If you make a mistake, don't worry; that "Back Up 1 Step" button is a general-purpose Undo button, so you can undo the delete with it.
The right-click menu often has useful object-specific functionality on it. For example, right-clicking on a toolpath gives you shortcuts for backplotting, verifying, and post-processing the operation.
View Shortcuts
You can hold down the Alt key and press the numbers 1 through 7 to cycle through common views (1 is the Top view, 7 is an Isometric view). Other useful mouse and keyboard commands include
- Holding down the left and right mouse buttons at the same time and moving the mouse does a zoom
- Rolling the mouse wheel does a "smart" zoom around the mouse location
- Holding down the middle button or mouse wheel and moving the mouse rotates the view
- Holding down the Alt key and the middle mouse button and moving the mouse pans the view
- Holding down the Ctrl key while clicking the left mouse lets you select multiple objects at the same time.
"X", "Y", and "Z" in dialog boxes
Most dialog boxes give you an easy way for you to get information from the model into the dialog box. Suppose you're programming a VoluMill 3-Axis toolpath and you need to get the top of the material from the model. Type in the letter "z" and press ENTER:

The dialog minimizes itself and allows you to select an object in the view. You can snap to an endpoint of a curve, a vertex of a mesh, etc., and use the TAB key to cycle through possible snaps. Once you've selected the object, the dialog will pop back up, with the correct z-value of the geometry you just selected inside the "Top of Material" edit box. You can use "x" or "y" to get those coordinates, too.
We hope these tips help you get the most out of VoluMill Universal. Visit http://www.volumill.com for more information, or follow us on Facebook or Twitter so you can get the latest news and tips from us automatically. Just click the links on the right side of this page to follow us.


